Our Blog
2 Easy Ways To Change WordPress Installation Language
WordPress is the undisputed leader among CMS cornering over 60% of the market share. One of the major reasons for its immense popularity is its flexible nature. You get complete control over every aspect of your website. There are also various ways which can be used to conduct any specific task. In this post, we are discussing how you can change WordPress installation language. More than 70% of the content written on websites made with the CMS, is written in English. However, in 2018 the non-English downloads surpassed the number of those done in the English language. This shows that the popularity of the web building tool is increasing among people who do not speak the tongue. Let’s see how you can use your WordPress installation in a language of your choice.
1. Change The Language Through Admin Dashboard
Did you just convert HTML to WordPress theme? Then you must be loving the convenient features offered by the platform. The CMS revolutionized the field of web development by taking coding out of the equation to a large extent. You can create a functional interface without writing a single line of code. Moreover, most website management tasks can be done without any programming input. The intuitive admin dashboard helps you handle your interface simply. You can change the language of your installation through the dashboard too.
i. Log In To Admin Dashboard
The admin dashboard of WordPress websites is a convenient and easy-to-use panel. It gives you access to each section of your website. Log in to the dashboard with by entering your username and password. You will see a menu on the left-hand side which lists the different components of your installation. Whether it is creating new posts or pages or adding a theme or plugin, every task can be executed through this panel.
ii. Change The Language Through General Settings
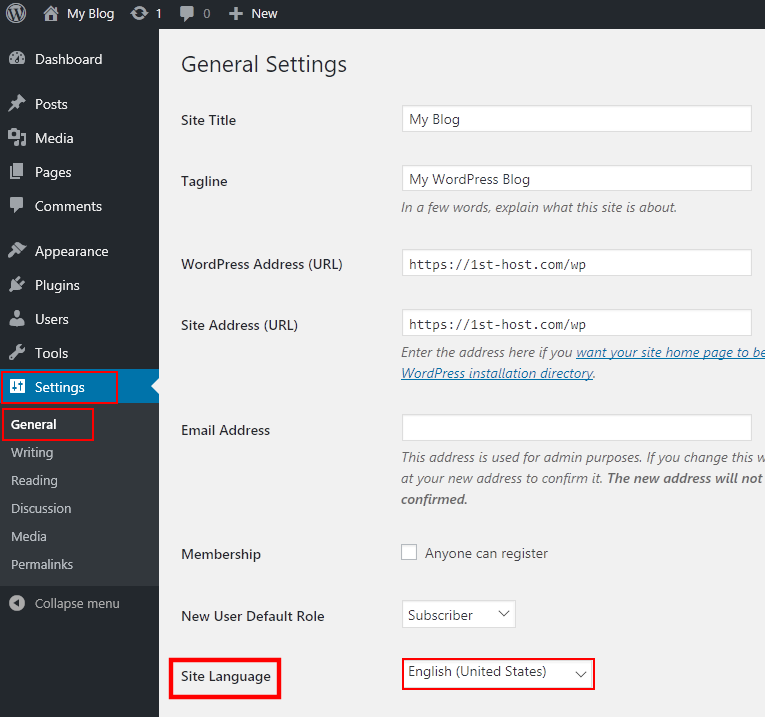
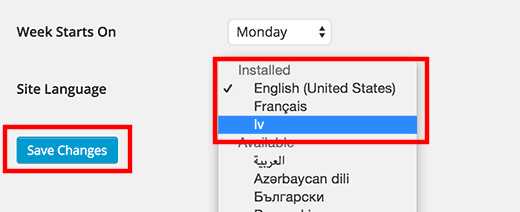
You will not find language as a listed option in the control panel menu. In order to access the option, you will have to first locate Settings in the panel. Once you locate it, click on the General options. A new settings screen will now open. Here, you can define the title of your website and set its URL as well. However, we are looking to change the language. Scroll down and towards the bottom of the page, you will find an option called Site Language.
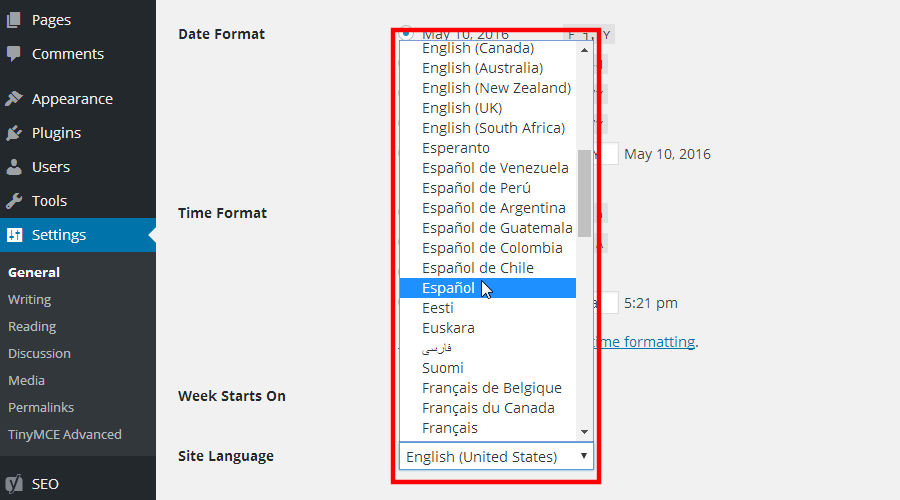
Click on the arrow icon in the dropdown menu displayed against the option. You will now see a list of various languages. Select the tongue that you want to use and the hit the Save Changes button.
In case, you do not find the desired option in the list, move to the next method.
2. Manually Install A Language File
We will now change WordPress installation language by manually installing a file. This will be helpful to people who did not find their language in the dashboard Settings Site Language menu.
i. Access The WordPress Translation Teams Web Page
The open-source nature of the platform has helped in its evolution with independent developers enhancing its various aspects. The CMS supports a translation project where volunteers work to convert the core into different tongues. You will have to access the WordPress Translation Teams web page to locate the translation file of your language. Go to the page and log in with your WordPress.org account.
ii. Locate The Desired Language File
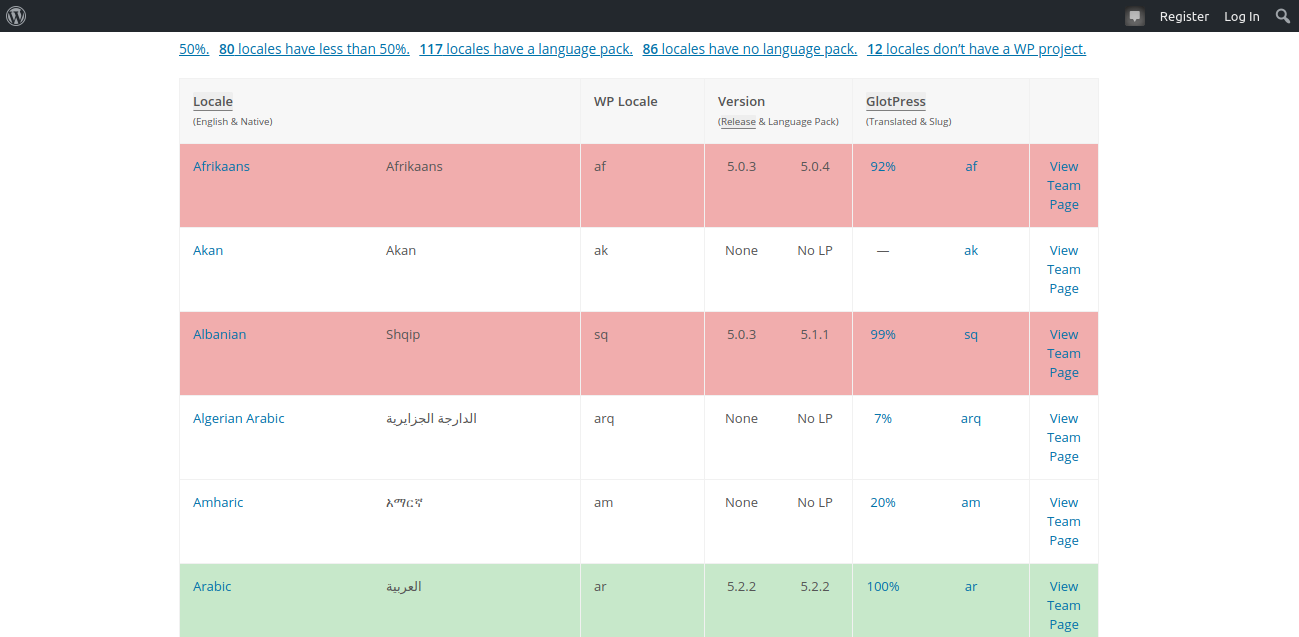
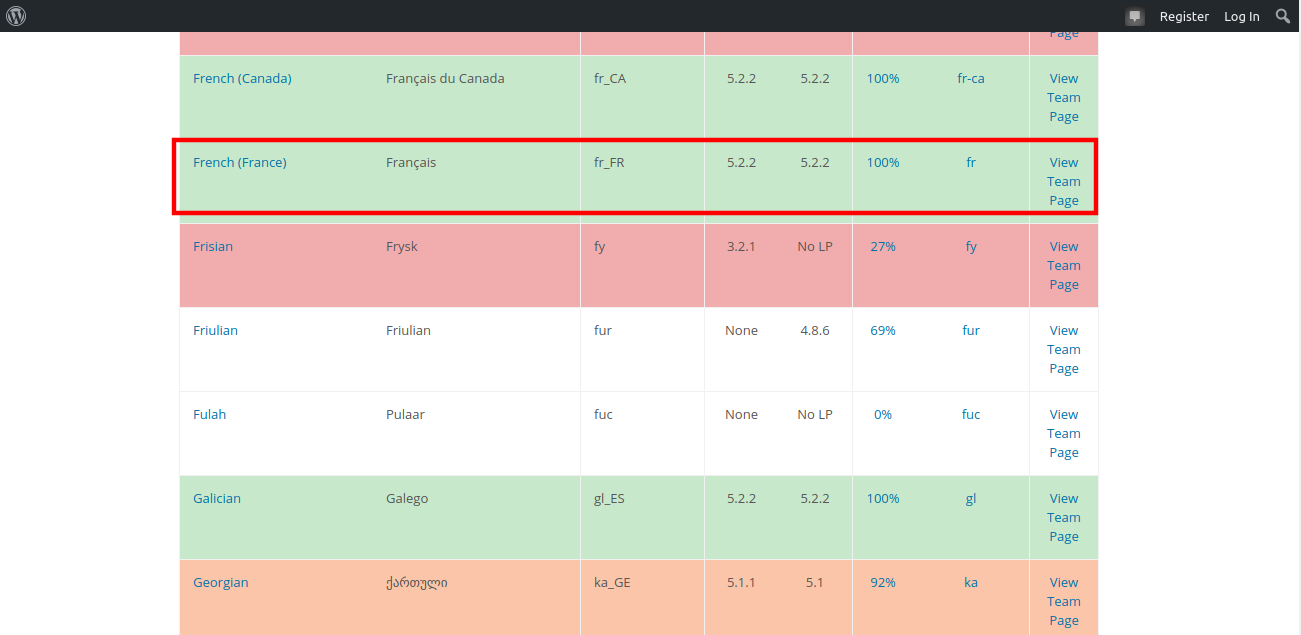
When you access the page you will find a list containing different languages presented in the alphabetical order. Scroll down the list to locate the option you are interested in. All the different tongues are arranged under the Locale option.
iii. Download The Language File
You will find that each option in the list is presented with a percentage value mentioned under the GlotPress option. This value denotes the status of the translation project for that specific item. For instance, the French (France) option has a 100% value which means that it has been fully translated.
A Portable Object format file with .po extension is used for converting WordPress into a specific language. This means that two files are created for each tongue namely, .po and a Machine Object file with .mo extension. We need the “.mo” file to fulfill our objective. Click on the percentage value of your chosen option. You will now be directed to another page which looks like the image given below:
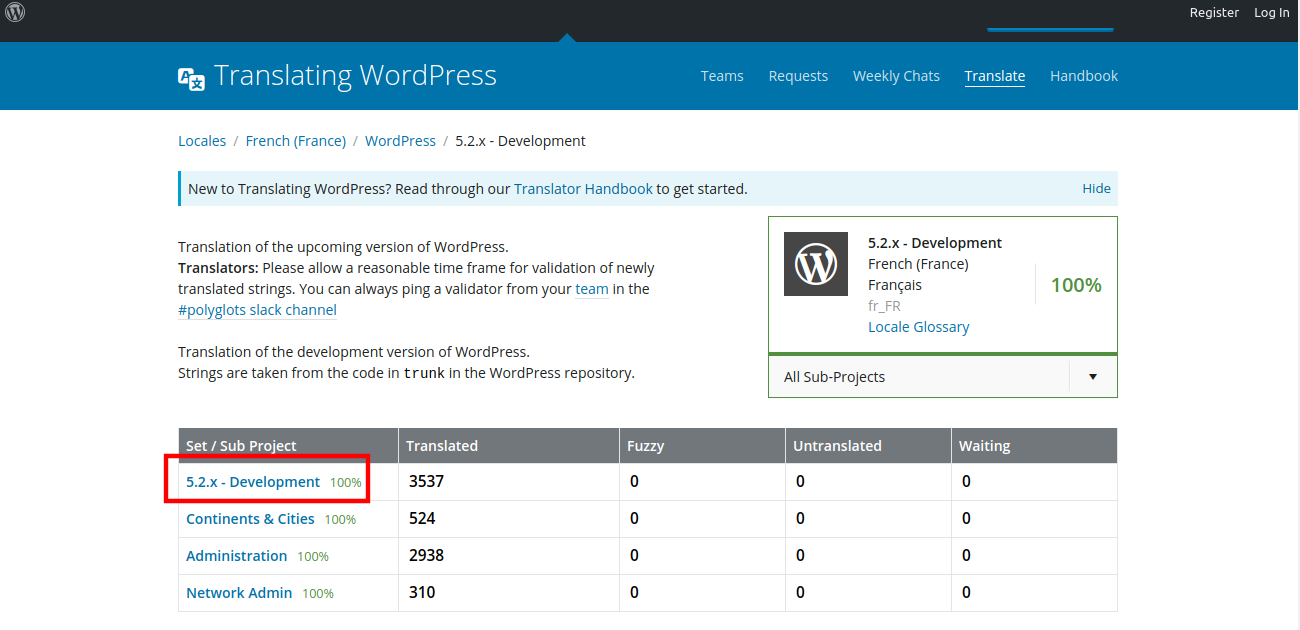
Here, you see the WordPress version 5.2 mentioned along with “Development”. This means that the project is complete but is still undergoing testing. Click the version and status link. On the next screen, scroll down to the bottom of the page. Locate the Export option and then in the first dropdown menu choose the “all current” option. In the second dropdown menu after “as”, select Machine Object Message Catalog (.mo). Now, hit the Export link.
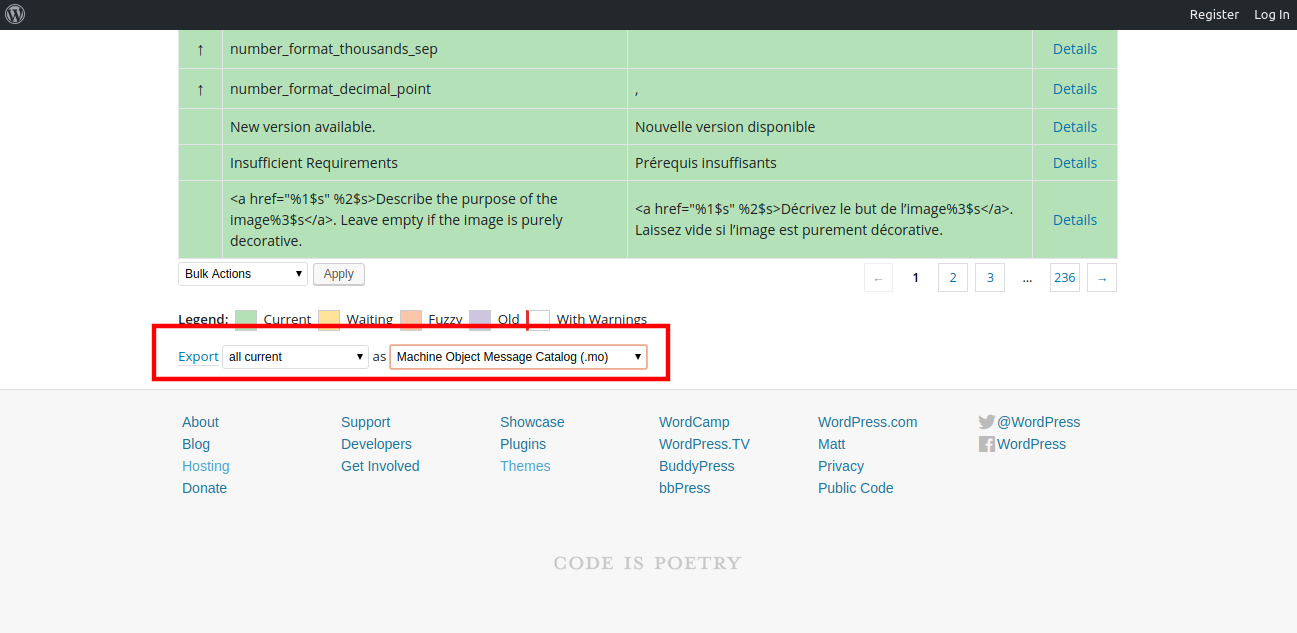
The file will be downloaded to your system.
iv. Install Your Language File
Connect to your website through an FTP application. You can see all the files and folders of your website in the Remote Site section. Locate and open the wp-content folder.
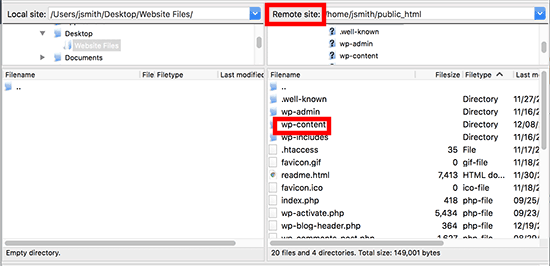
Upload your file in the languages folder located in the wp-content.
v. Change The Language In The Dashboard
Go back to the dashboard of your website. As explained in the first method, access the Site Language option by visiting Settings > General. Your language will now be visible among the options in the dropdown menu. Select it and then press the Save Changes button. It will now become the language of your installation.
Conclusion
These are simple methods to convert a WordPress installation into your chosen language. Even new users who convert a site to WordPress or create a fresh interface can use these processes to change their website’s language.