Our Blog
9 Key Things To Do After Installing WordPress
WordPress is one of the most powerful web-building tools available. People prefer it because of its open source and easy to use nature. In fact, the minimal coding required to use the platform is one of the major reasons which encourage people to convert HTML to WordPress theme or migrate from other formats. Many users do not possess a technical background and are unaware of the things to do after installing WordPress. In this article, we are presenting a list of essential steps that users must take right after installing the CMS. This will help secure the interfaces and give them a good headstart in the virtual world.
1. Modify Site Title, Tagline, And Timezone
The first thing users must do after the installation is to change the site title by accessing the General Settings. After logging on to the admin dashboard, click on the “Settings” option in the menu. The General Settings page will open which lets you make some basic changes. Enter the name of your interface in the first field called “Site Title”. The name will appear in a browser’s title bar as well as used by WordPress for identification. Provide a brief description of your interface in the next field called “Tagline”. Synchronize the timezone of the website with your preferred location by the given option in the menu. Click the “Save Changes” button to confirm the modifications.

2. Complete The User Profile
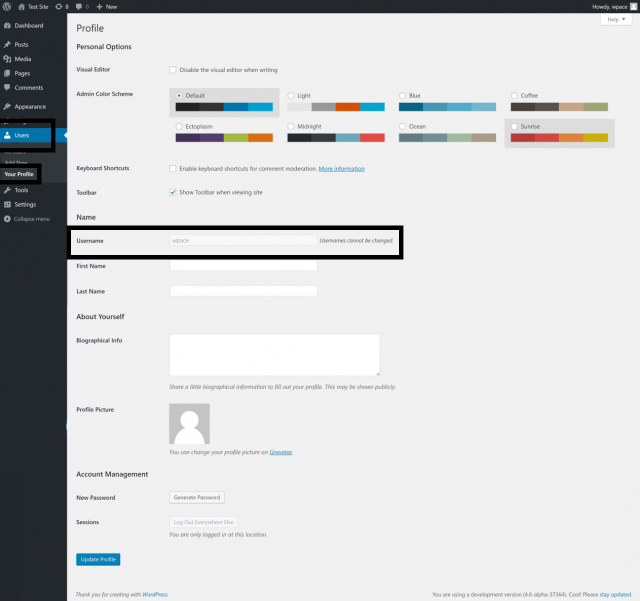
The next step is to complete and update your user profile. It is necessary to do so otherwise WordPress will use the name appearing with your posts and comments as the username. In the navigation menu, go to the “Users” option. Click it and open the “Your Profile” screen. Enter the name to be displayed on the website. You must also provide an email Id to WordPress for administrative purposes.
3. Alter The Permalink Structure
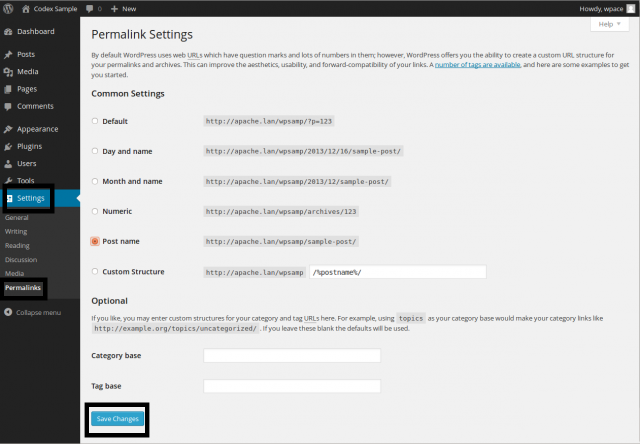
The permalinks are the permanent URLs of each post and page of the website. The CMS by default creates a URL like this:
https://www.sample.com/?p=123
This type of link is unsuitable for good user experience as well as SEO. in order to change it, access Settings> Permalinks. Make your selection by checking the radio button against the preferred option and then click the “Save Changes” tab.
4. Change The Default Category Name
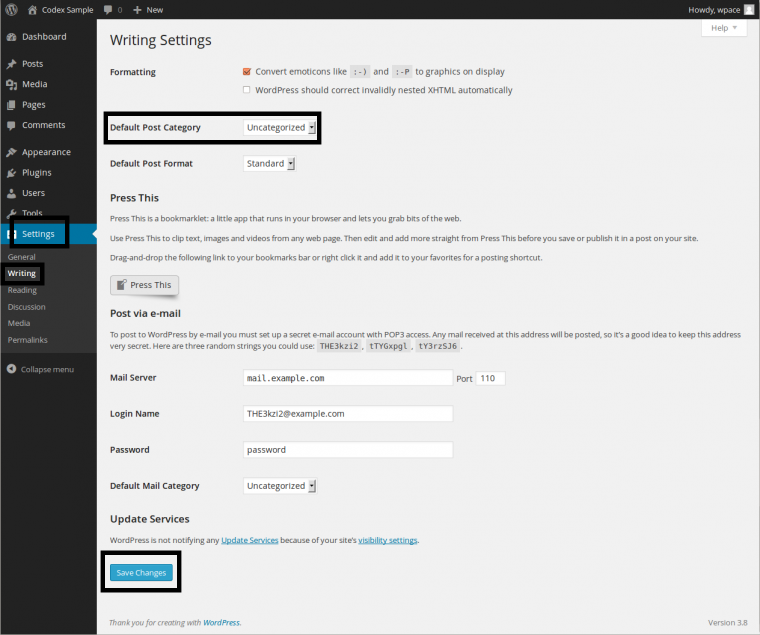
WordPress, by default, will show the category name for all posts as “Uncategorized”. You can easily change it to custom categories of your choice from the admin dashboard. Go to “Settings> Writing”. In the screen that opens, you can make the changes by using the drop-down menu for “Default Post Category”.
5. Create A Backup Plan For The Website
One of the most essential things to do after installing WordPress is to set up a backup for the website. This is necessary to protect important data from being lost in case an issue arises. Most dedicated WordPress hosting services provide the facility but users must make some other alternative arrangements too. They can use any of the numerous backup plugins available for the purpose. These tools are quite helpful as they automate the whole process. Users can choose to save the backup on cloud storage services like Google Drive, Amazon S3 etc.
6. Enable Caching On The Website
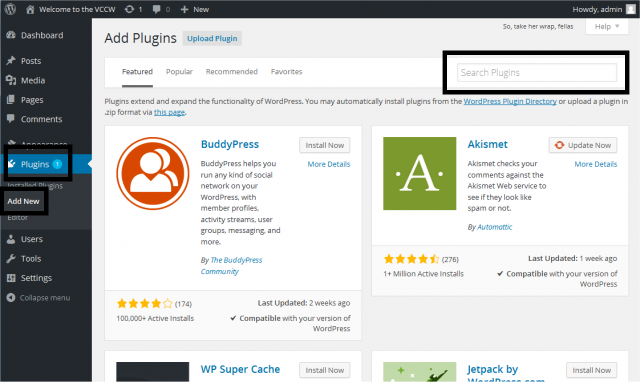
Your website is competing against numerous other interfaces for attracting visitor’s attention. Every effort must be made to increase its appeal and improve its visibility. People hate to access an interface that takes longer to load. Enabling caching helps serve a cached copy of a webpage to a user and reduces the loading time. There are various plugins available for the purpose and choosing an efficient one will be beneficial for your interface. Access “Plugins” in the menu. Select the “Add new” option and search for the desired plugin.
7. Choose An Appropriate Theme
The open-source CMS supplies a default theme with the core files but this template may be unsuitable for your interface. There are numerous themes classified in a range of categories available for free as well as at a price. Select one which has been made for your industry or occupation. There are various multipurpose templates also which can be used. An appropriate theme can bring in more visitors and its feature can improve the performance of the website.
8. Take Necessary Steps to Ensure Website Security
WordPress is a secure platform but its popularity makes it an attractive target for hackers. You must take some necessary steps to ensure that your interface remains well-protected. There are some best practices that must be used by website owners like using strong passwords. The updates released by WordPress also contain security features and they must be installed always. In addition to this, you must install a security plugin that has features like firewall, website monitoring, login security etc.
9. Add A Contact Form
One of the most essential add-ons for a website is a contact form. It is an efficient way through which visitors can get in touch you. Contact forms are helpful in generating valuable user information and increase the subscriber base of the interface. Moreover, they help keep spam out while enhancing the user engagement of the website. A good plugin will help add the feature to your interface. Most of them come with various customization options so that you can include unique fields and queries in a form.
Conclusion
These are just a few essential things to do after installing WordPress but users must make an assessment of their requirements to decide about what must be done immediately after completing the installation of the open-source CMS.