Our Blog
A Beginner’s Guide To WordPress Theme Customizer
The user-friendly nature of WordPress has made it the number one CMS in the world. Beginners love it because they do not need to write any code for most website building and management tasks. Professionals find it handy because it gives them total control over every aspect of development. One such convenient feature that is available out of the box in the CMS is the WordPress Theme Customizer. This default tool allows you to modify every element of your theme even if you do not possess any programming language. In this article, we are explaining, in brief, the main attributes of this helpful tool. This will be useful for beginners who have just shifted to the open source platform and would like to use the theme customizer for personalizing their templates.
1. Accessing The Customizer
The customizer can be easily accessed through your website’s admin dashboard. Once you are logged in to your dashboard, locate Appearance in the menu. Click on it and you will see an option called Customize. Selecting the option will open the default personalization tool with your presently activated theme.
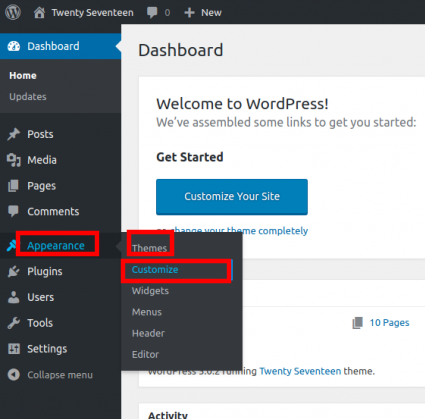
Users can also modify an installed theme which is not activated with the personalizing solution. Go to Appearance in the control panel and then choose Themes. This will display all the templates which have been downloaded on your website. Now hit the Live Preview tab below the chosen layout and the template will open in the tool.
2. Using The Theme Customizer
Like most WordPress features the customization solution for themes is also an easy-to-use tool. When you open it, your selected theme is shown on the right. On the left, you can see a set of control options. These pre-defined options remain the same and are not affected by the chosen layout. Users only need to click a control option to modify it. Another way to do the job is to click the blue pencil icon on the desired section in the theme preview.
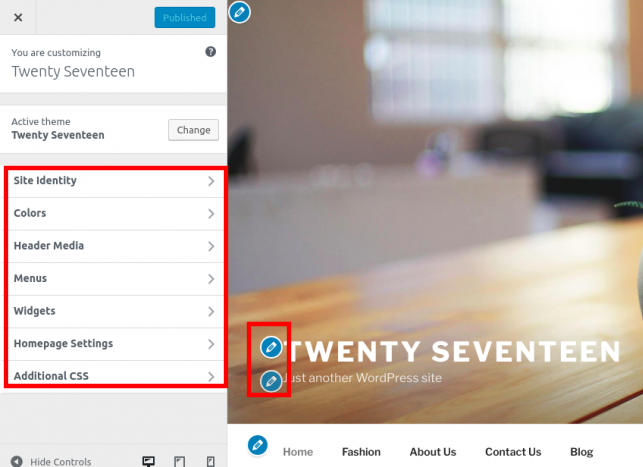
We will now discuss each of the settings options one by one.
3. Defining Site Identity Settings
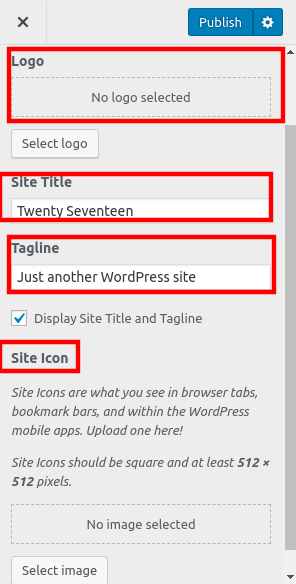
The text “Just another WordPress site” is displayed, by default, as the tagline. You must replace it with a text of your choice. Similarly, you will also want to change the title of your interface. All these modifications can be made by configuring the Site Identity panel. Click to open it and you will find fields for Site Title and Tagline. There are also options for adding the Site Logo and Icon.
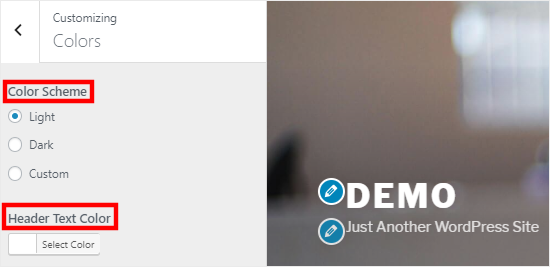
4. Modifying Theme Colors
The options provided in the Colors settings will depend on the theme you are using. In the example given here, we are using the Twenty Seventeen theme. We are given a choice of choosing a color scheme for the entire interface. There is also an option to select the Header color. The configuration setting shown to you may be different from the one shown in the image given below.
5. Managing Navigation Menus
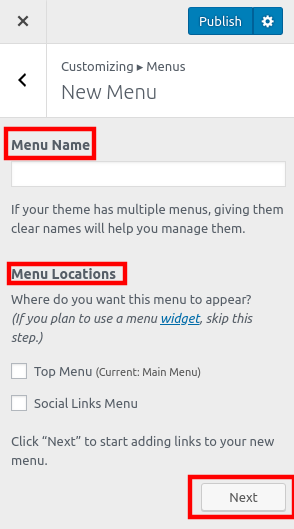
We will now show you how to generate navigation menus with the WordPress Theme Customizer. Clicking on the Menus option will open the settings panel and show all the existing menus. If you want to build a new one, hit the Create New Menu button. Enter a name in the Menu Name field. Select a location for your new navigation aid and click Next.
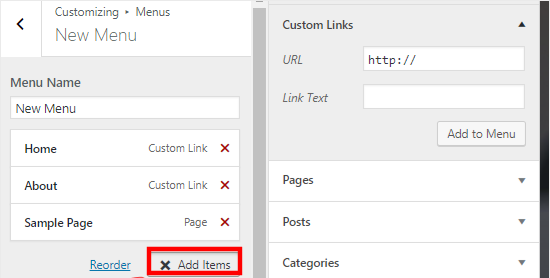
You can now include links to different sections by using the Add Items option. Remember locations for menus depend upon your theme.
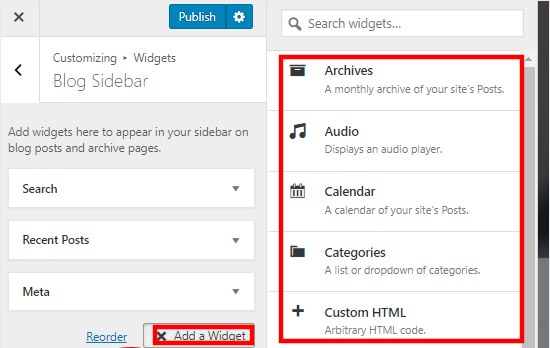
6. Controlling The Widgets
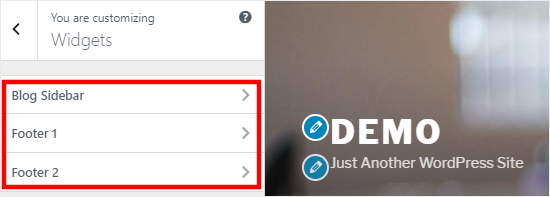
Many people convert HTML to WordPress theme or migrate from other formats to the platform. Many such users will be unaware of widgets which are small blocks which perform a specific action. There are some pre-defined locations in every theme where widgets can be displayed. In the image shown here, there are three specified locations.
When you click on any location, you will see the blocks already present in that area. Press the Add a Widget tab and a list of widgets will be displayed. Select the one you want to include on your website.
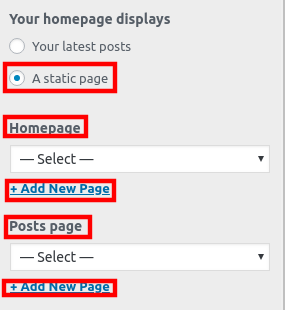
7. Managing The Homepage
WordPress, by default, displays the latest posts on the homepage. In case you want to create a custom homepage, you will need to configure the Homepage settings. Click to expand the Homepage panel and then turn on the radio button against the A static page option. You will now see two dropdown menus for defining your homepage and choosing another to show the blog posts. Users can generate new pages by + Add New Page link below any of the menus.
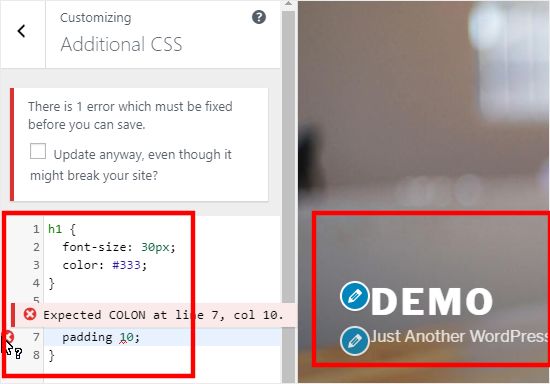
8. Adding Custom CSS
You can define your own style elements by adding custom CSS. Professionals use this method by adding the CSS code to their theme’s style.css file. However, beginners can do the same by using the Additional CSS option in the customizer. As you enter the code in the specified area on the left-hand side, you can preview the live changes in the right-hand panel.
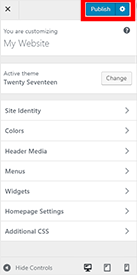
9. Applying The Changes
Once you have made all the modifications, they need to be applied to the website. Hitting the Publish button right on top of the control panel will confirm the changes. In case, you need some more time before applying the modifications, you can save them as a draft. Hit the Gear icon next to the Publish tab. This will present you with three options namely, Publish, Save Draft, and Schedule. Selecting Save Draft will store all the modifications. You can choose Schedule to publish the altered theme on a specified date and time.
Conclusion
Whether you are converting HTML to WordPress theme or acquiring a new interface, you can easily modify a template with the theme customizer. This simple guide will help you carry out the changes without encountering any trouble.